How to make a CDC-approved Pocket Mask
Use your quarantine time to make masks for yourself, your family, and health workers
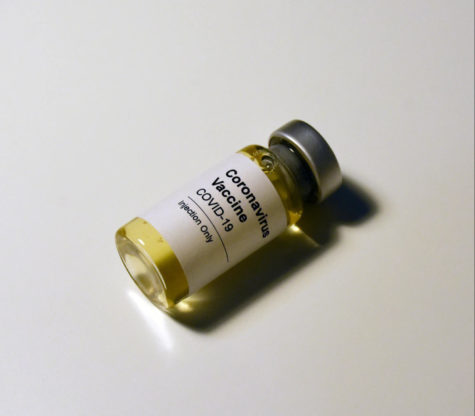
There is currently a worldwide shortage of N95 respirators, which are special masks that filter out airborne particles. You can donate homemade cloth masks to health workers through the Masks Now Coalition. Cloth masks are not replacements for N95 respirators, but health workers wearing a reusable cloth mask with an N95 can help the N95 last longer.
The Masks Now Coalition shows you how and where to donate and how to sew masks. If you don’t know how to sew, you can also volunteer to find organizations that need masks, distribute masks, donate materials or money, coordinate local volunteering efforts, or do other behind-the-scenes work. Click here to sign up.
One of the CDC-approved mask patterns supplied by Masks Now is the Pocket Mask. This mask is for less-involved health workers, and it opens at the top so that a surgical mask can be placed inside. According to Masks Now, “These should only be used in non-surgical settings when the healthcare provider (HCP) will be more than 3 feet from a symptomatic patient OR within 3 feet of a symptomatic patient wearing a surgical facemask.”
However, this mask doesn’t require any fancy filter fabric to make. If you want to sew masks to donate and, like me, you don’t have fancy filter fabric, you could start out by sewing a Pocket Mask or two for yourself or your family, and once you’re confident in your mask-making skills, you can start cranking them out for health workers. Save your shoddier work for yourself because you don’t need to help coronavirus patients every day. If you don’t plan on donating, you should probably make a less complicated mask for your personal use. There are tons of online tutorials for cloth face masks.
But hey, you’re under quarantine, and you have tons of free time, so you might as well make some face masks to contribute to the worldwide effort to stop COVID-19. You can find the pattern and directions to make a Pocket Mask here.
I’m not a super experienced sewer, as I assume most high schoolers aren’t, so I found the official instructions a bit hard to understand. But I eventually figured it out, and below are directions rewritten by me with more explanation than the official instructions and tips I learned from my mistakes.
Sewing a Pocket Mask isn’t super hard, but this definitely shouldn’t be your first sewing project. You should be comfortable with using a sewing machine, especially controlling the speed of the machine, backstitching, sewing corners, adjusting the presser foot while sewing, and operating the needle handwheel. It’s possible to hand-sew a Pocket Mask, but it will take forever. A hand-sewn mask will also be less secure than a machine-sewn mask, so please use a machine if you’re going to donate to hospitals.
To make a Pocket Mask, you need:
- Two to three hours of free time
- At least 50% cotton fabric, preferably one patterned and one solid (or you can use an old T-shirt); Make sure your fabric is clean! If you just bought it, didn’t store it in a clean place, or just aren’t sure if it’s been washed, stick it in the washing machine with detergent and wash on hot. Then dry on hot. This will make it clean, of course, and also prevent it from shrinking when it’s washed later.
- Your average all-purpose polyester thread
- Sewing machine
- Ruler
- Iron & ironing board (unless your fabric is already nice and smooth)
- Fabric scissors
- Your pattern and pleat guide (don’t forget to cut out your pieces and tape them together!)
- A ton of sewing pins (20 max)
- Washable marker, pencil, or chalk
Steps:
1. Wash your hands! Especially if you’re donating! And if you pause your work, wash your hands again before you keep sewing.
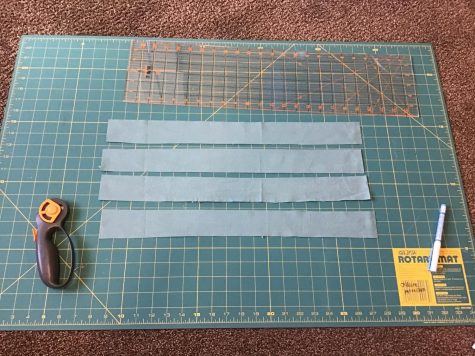
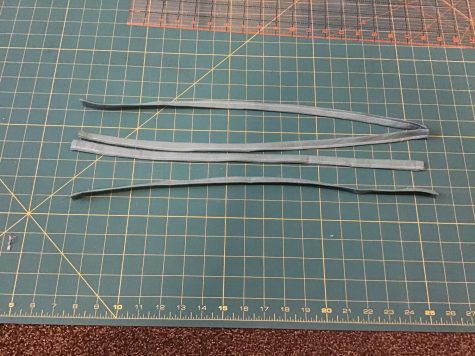
2. Cut out your ties. (You can use fabric for this or find some pretty ribbons around the house. If you do use ribbon, however, HEM BOTH ENDS. If you don’t, your ties might rip out of your mask. That happened to me. Not fun. Skip to Step [5] if you’re using ribbons.) Cut out four strips of fabric that are 20” long and 2” wide. You don’t really need the pattern to do this. Don’t freak out if your cutting isn’t perfect because the edges will be covered anyway.
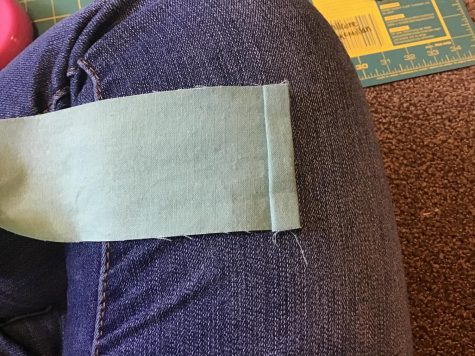
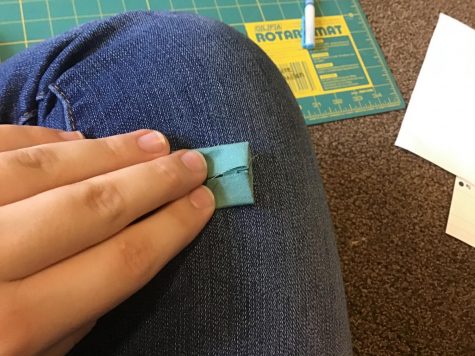
3. Now you’ll hem your ties. Start pinning first by folding down one end about ¼”. (You might notice in the photo that I folded my end down twice. This is unnecessary and just made my life harder later.) Next, fold down both side edges so that they meet in the middle. Fold the whole thing in half and pin in place. Continue pinning down the whole length of the tie by repeating that fold: make the edges touch in the middle and then fold in half. When you get to the other end, do the same thing you did with the other end by folding it down about ¼”. When you finish pinning, there should be no exposed edges.
4. Sew in a straight line down the length of your tie about ⅛” from the open edge (where you’ve got two folds of fabric on top of each other). Don’t forget to backstitch! This is where you sew backwards over a few previous stitches at the start and finish so that your thread doesn’t come out.
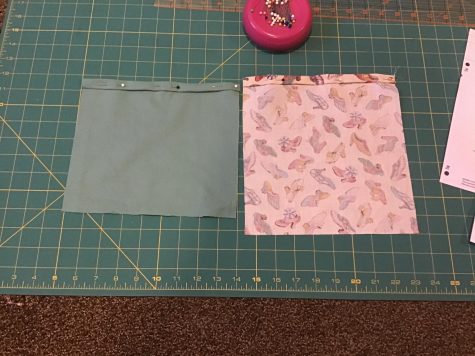
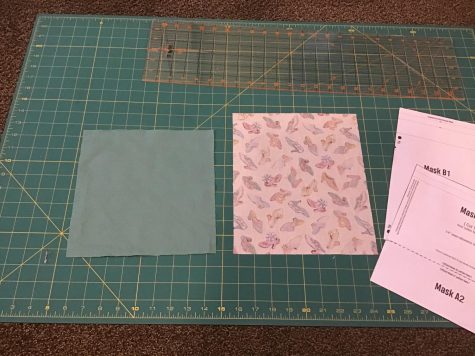 5. Cut out your two main mask pieces using the pattern. You might be thinking, “Mask A must be the front, and Mask B must be the back!” This would make perfect sense but is, unfortunately, incorrect. Mask A, the shorter piece, is the back, and Mask B, the longer piece, is the front. I used a snazzy shoe-themed fabric for my front and a solid green fabric for my back. A ¼” seam allowance is included in the pattern, so cut exactly to fit the pattern.
Throughout the rest of this tutorial, I will use the words “right” and “wrong” to identify the different sides of the fabric. The right side is the side you want to be visible in your finished product and is more vibrant in a patterned fabric. The wrong side is the side you want to be hidden in your finished product and is more faded in a patterned fabric. However, if you’re only using one fabric, you should make it so the wrong side is facing out with your back piece so that it’s easy for the wearer of your mask to tell the front of your mask from the back. But in my tutorial, I will assume you’re using two fabrics like I did and use “right” and “wrong” accordingly.
6. Use a washable marker, a pencil, or chalk and your pattern to mark on the edges of your fabric where you will hem and, on the right side of your front piece only, where you’ll put the ties and the little notch on the pattern. Instead of marking the notch with your marker or whatever, you could cut an actual notch into the edge of your fabric, but I didn’t do that because notches make me nervous.
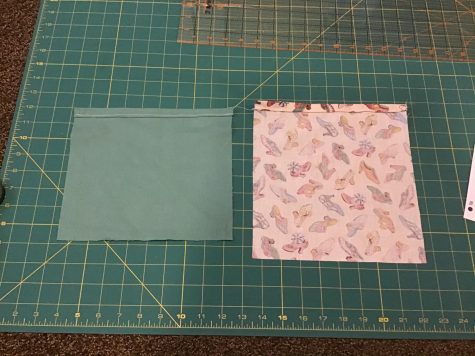 7. Use those hem markings to fold down and pin your hems on both pieces. You should fold twice directly on your two markings, and no raw edges should be visible where you’ve folded. Then sew your hems similarly to how you hemmed your ties, about ⅛” from the open edge.
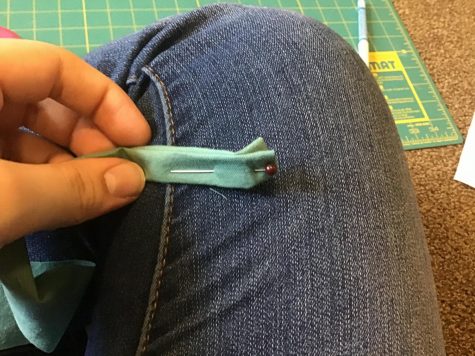
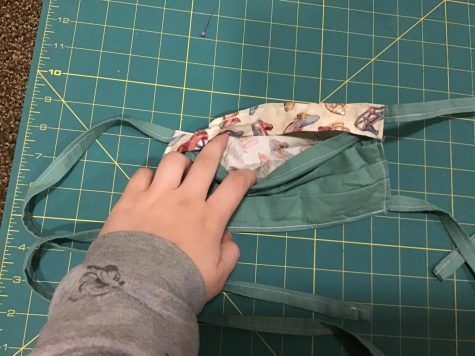
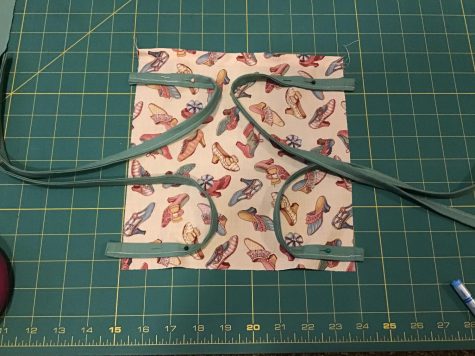 8. Now you’ll pin your ties into place like I did in the photo onto your front piece. Use the markings you made earlier and make sure the RIGHT side is facing up. Choose the ugliest end of each tie and position it so a little bit is off the edge of the fabric. I lined up the edge of the bump, which I made earlier by folding down the end of the tie, with the edge of the fabric. The original instructions have you align the end of the tie exactly with the edge of the fabric, but I’ve found that doing it my way makes sewing easier later and decreases the likelihood of the ties ripping out. Position your pins a little farther from the edge so that you won’t run them over later. Instead of pinning, you could also “baste” the ties in place, which is where you do a few temporary stitches (by hand), but I didn’t do that because I’m lazy. It turned out fine.
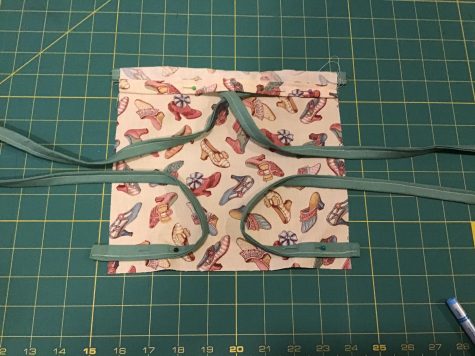 9. Fold down the hemmed top of the front piece so that it lines up with the notch marking you made earlier and pin it into place with the pins closer to the middle. Your ties should fit snugly right under the fold like in the photo. If they don’t, double check the placement of the ties and the fold with your markings and pattern.
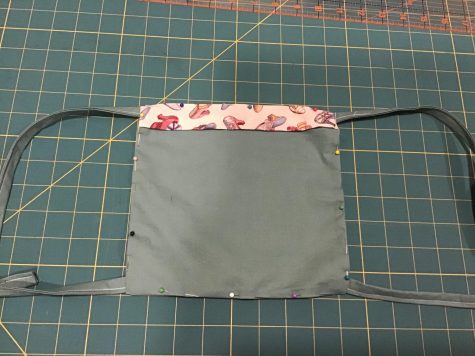
 10. Bunch up your ties and gather them into the center of your fabric so that they don’t touch the edges except the four spots where you’ve pinned them. Place your back piece on top so that the RIGHT sides of both pieces are touching. Your sides and bottoms should line up perfectly, and the hemmed top of the back piece should be a little bit below the top piece. Pin on the sides and bottom but NOT the top. This might be a little awkward with the ties in the middle of your makeshift pouch. Double check that the ties are not stuck in any of your pins except where they should be.
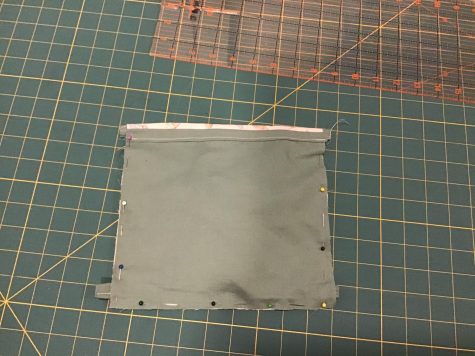
11. Sew around the sides and bottom of your mask about ¼” from the edge. Be EXTREMELY CAREFUL to not sew over your ties except the four spots where they must be secured. I started from the top right corner of my mask, and once I sewed over my first and second ties, I reached into the pocket, took out the pin that had been holding the second tie in place, and pulled the second tie farther from the edge. I took out the pin holding the third tie a bit before I actually sewed over it because it was more at risk while I sewed up the bottom. Since you’re not sewing up the top, you probably won’t need to take out the pins for the first and fourth ties until after you’re done with this step. If your ties get wiggled out of place, remember that the top ties should be right against the top fold, and your bottom ties should be right against the bottom seam (not the bottom edge).
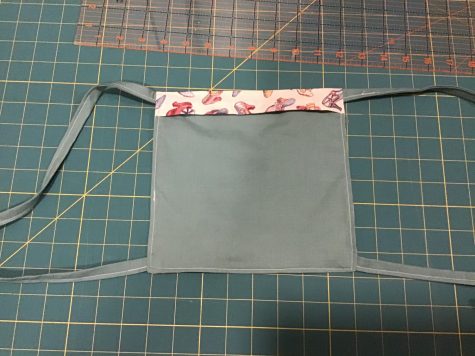
12. When you’re done with Step 11, your mask should look like this from the back. Double check that your ties are where they should be and that the fold you made in your front piece is secure before you continue. Take out all remaining pins.
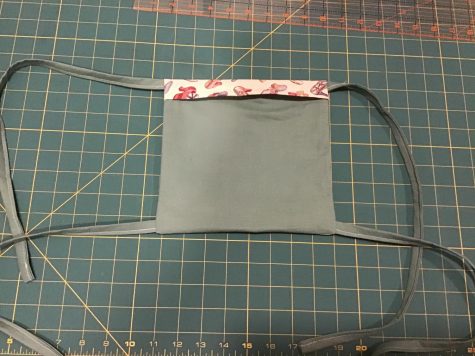
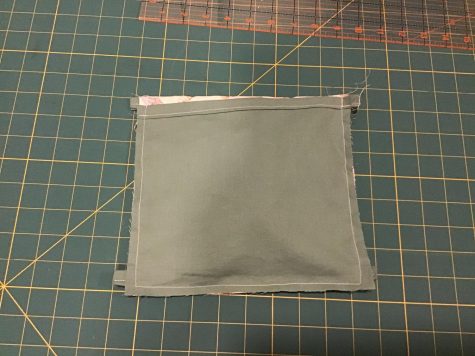
13. Turn your mask inside out! Pull on your ties to get it out all the way. The back of your mask should look like the photo far left, with the hemmed top of the back piece under the fold of the front piece. The front of your mask should look like the other photo, only showing your front fabric. Only the right side of your fabric should be visible.
 14. Pin around the whole edge of your mask. You’re going to be stitching around the whole thing to make it more flat and secure. Rub the seams between your fingers to make sure they’re fully right-side-out before you pin. DO NOT pin your pocket closed. At the top, you’ll only be sewing through your front fabric.
 15. Sew about ⅛” from the edge of your mask around the whole thing. Be super careful to not sew your pocket closed. If it helps, pin the top edge of the back piece away from the fold in the front piece where you’ll be sewing. When you’re going over where your ties are, the fabric will be a lot thicker, so your sewing machine might struggle a bit. Lift up your presser foot a bit while you go over the ties, and put more effort and focus into pulling the fabric through manually.
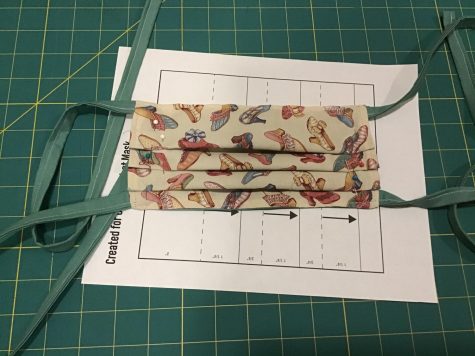
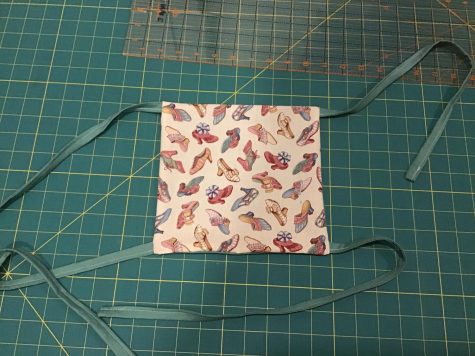
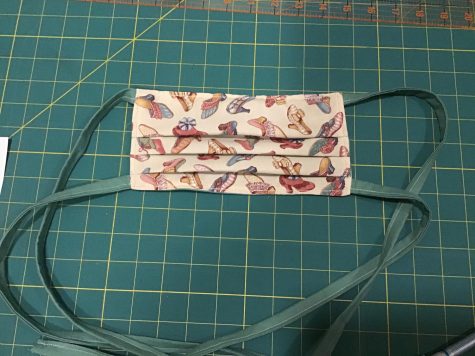
 16. Now you’ll start on your pleats, which are the hardest part of this project. They’re very important for making the mask tight to the face, though. Use the pleat guide from the pattern PDF to make markings where you’ll fold the pleats on each side. I found the pleat guide really hard to understand, so use pictures of my mask to help you figure it out. You can also try folding the pleating guide itself and then do it with your fabric. When you make markings on your fabric (only on the edges!), distinguish in some way between the dotted and solid lines. When pleating, bring each dotted line to meet the solid line right below it. You should end up with three pleats that are ¾” wide. They should line up with each other, and the bottom pleat should touch right above your bottom tie. Reference the photo above right of my finished pleats. Though you will only be sewing your pleats on the side edges, it’ll be easier to place your pins closer to the middle of your mask like I did. This way, you won’t have to pin through the super thick layers of the pleats, and you can keep the pins in while you sew. When you run your finger down the middle of your mask from top to bottom, you shouldn’t catch your finger in any of the pleats. If you do, your pleats are in the wrong direction.
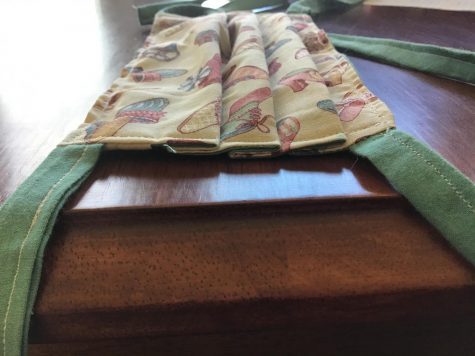
17. Sewing through your pleats will be really hard, but it’ll look really cool when you’re done! In addition to sewing over the pleats, you will again sew around the whole edge like you did in Step 15. I recommend you not start sewing on top of your pleats so that you don’t have to backstitch on them. When you get to the pleats, your sewing machine will not be happy with you because you’ll be sewing through 12 pieces of fabric at once. You have to go over them really really slowly and manipulate the presser foot as you go. Even then, you can’t change the speed at which the needle actually enters the fabric with foot pedal sewing. If your sewing machine is really struggling, use the handwheel on the right side of your sewing machine to slow down the needle. This will be a big pain in the neck, but when I didn’t use the handwheel, my thread straight-up snapped five times while going over the pleats.
 18. Voila! You’re done! Check that your pocket fully opens. For your personal mask, you can get creative with how you tie it. If you have long hair, you should probably do a ponytail or something before you put your mask on. Make sure the mask covers your nose and mouth. Wash the mask with detergent in the washing machine once you’ve finished sewing, especially if you’re donating.
19. If you’re donating masks, look at the PDF where you got the pattern for packing instructions. Be sure to sign up in the volunteering survey I linked earlier for donation instructions more specific to your area.
Your donation will support the student journalists of Mead High School. Your contribution will allow us to purchase equipment and cover our annual website hosting costs.

Adah McMillan is a Senior. She enjoys reading, drawing, eating candy, playing the piano, listening to musicals, and being right. She is involved in choir, NHS, the MHS Book Club, and SVVSD's Innovation Center. She is excited to do more work in The Mav this year and make the website as perfect as it can be.
You can contact her at [email protected].